As Shout’s videographer I love using different gadgets and equipment to make our video productions stand out from the crowd. In this blog I will look at three of my favourites….
The slider
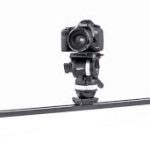
The slider is a really versatile piece of equipment which enables you to make smooth tracking shots which really enhance the production value of your video.
(an example of a tracking shot)
Tracking shots are used in Hollywood productions and traditionally were made using a piece of expensive and bulky equipment known as a dolly. Advancements in technology mean that cameras are now smaller and lighter which means grip equipment such the slider could be created.
Due to its small size and weight the slider can be placed pretty much anywhere that has a flat surface. It is also easy to set up and carry which is great for adding some production value to a hectic shoot such as an event film.
Personally I like to use the slider to make my establishing shots more interesting, starting the shot behind an object then slowly moving along the track to reveal the location that I am establishing.
If you are using 2 cameras for an interview the slider can also add some flair to your wide shot.
The jib
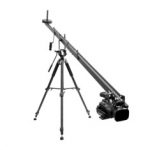
Related to the slider is the jib. Again this is a smaller lightweight version of a more expensive piece of equipment called a crane.
The jib is a little more difficult to set up as you need to add counterweights in order to ensure that your shots will be smooth. However once it has been set up the results can be amazing…
Jib shots can be perfect for establishing a location or showing the height and scale of an object. Like the slider the best results are achieved when there is depth in the shot, for example starting the shot behind a wall then craning up so the camera travels past the wall then reveals what you are filming will add a glossy look to your video.
Intervalometer for timelapse
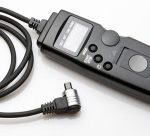
Timelapse shots are really nice addition to any video project. Not only do they look great they can be used to show a large passage of time in a few seconds.
We have used time-lapse in many of our Broadcast PR videos at Shout! They are great for showing crowds gathering or showing something being built.
There are two ways to create a time-lapse, you could set up your video camera and record for a long time then speed it up in post, which is great and convenient, however for better results I suggest using a stills camera and an intervalometer.
The intervalometer is used to tell the stills camera to take photos at different times and durations. A whole blog could be written on different settings for time-lapse, but as a general rule more photos over a shorter period of time will give you a smooth effect, (ideal for showing crowds and flowing traffic), whereas less photos over a longer time is good for things like sunsets or things being built.
Using the intervalometer and a stills camera will produce better results than a video camera as each frame of video will be an extremely high quality still. In post production you can add movements such as zooms or tracks.
With new video gadgets coming out all the time I am sure I will be writing part two of this blog some time soon. In the meantime if you have any questions about video production or would like to see some of these gadgets in action please get in touch.
